
Việc đầu tiên khi tìm hiểu selenium đó là selenium mở browser lên như thế nào.
Nếu như chúng ta hình dung các trình duyệt (browser) là phần cứng, các đoạn code mình viết là phần mềm. Thì để 2 thành phần này nói chuyện được với nhau mình cần có các driver đó là lý do mà phần lớn mọi ngừoi thấy driver được đặt cho tên biến khi dùng với Selenium
Bài này cho mọi ngừoi những cách thức khác nhau để mở một trình duyệt lên, đây là bước đầu tiên của bất cứ một test case nào cũng phải có.
Chrome
Viết đoạn code như dưới đây rồi run nó :
   public static void main(String[] args) {
        new ChromeDriver();
    }
và bạn thấy lỗi văng ra ở đoạn code ở mở :
Exception in thread "main" java.lang.IllegalStateException: The path to the driver executable must be set by the webdriver.chrome.driver system property; for more information, see https://github.com/SeleniumHQ/selenium/wiki/ChromeDriver. The latest version can be downloaded from http://chromedriver.storage.googleapis.com/index.html
Vấn để là message này chỉ đến đó là hệ thống không biết được đường dẫn tới driver mà được gán cho biến môi trường webdriver.chrome.driver là ở đâu?
Các bước để có giúp hệ thống hiểu được:
- Kiểm tra version hiện tại của Chrome trên máy tính của bạn.
- Lên trang
http://chromedriver.storage.googleapis.com/index.htmlkiếm đúng version chromedirver đúng với version ở bước 1 - Giải nén file vừa donwload xuống, lấy đường dẫn của file này
- Thêm đoạn code để máy bạn hiểu được
webdriver.chrome.driver
     public static void main(String[] args) {
        System.setProperty("webdriver.chrome.driver","<chrome-driver-path>");
        new ChromeDriver();
    }
Chạy lại đoạn code ở trên và xem kết quả nào!!!!
Firefox
Tương tự như chrome chúng ta cũng có thể mở firefox bằng đoạn code dưới đây
      public static void main(String[] args) {
        System.setProperty("webdriver.gecko.driver","<gecko-driver-path>");
        new FirefoxDriver();
    }
}
Internet Explorer
public static void main(String[] args) {
        System.setProperty("webdriver.ie.driver","<ie-driver-path>");
        new InternetExplorerDriver();
    }
Safari
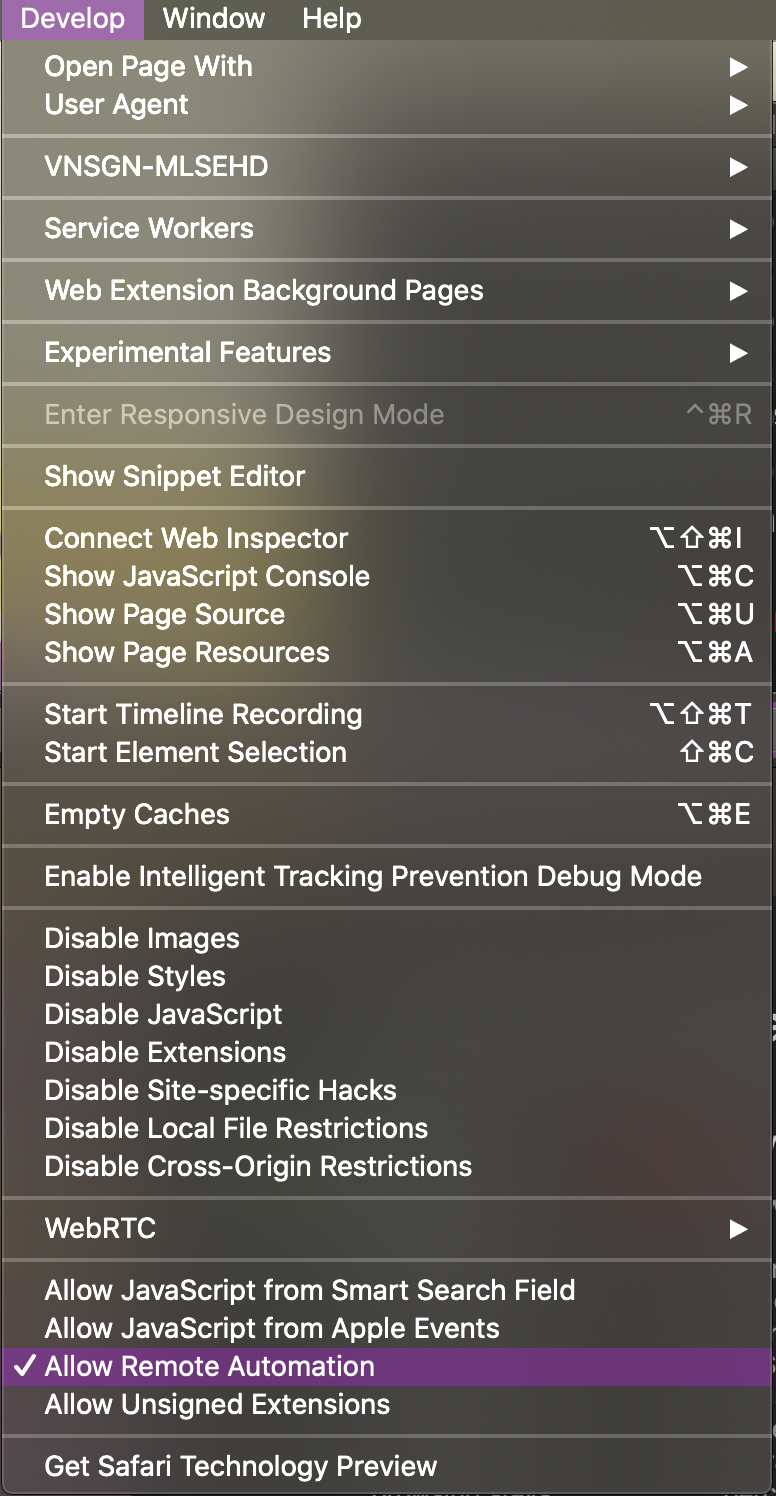
Đối với Safari thì bản thân nó đã được Apple tích hợp sẵn driver ở trong đó.
- Chỉ cần enable mode “Developer” : Safari > Preferences » Advance
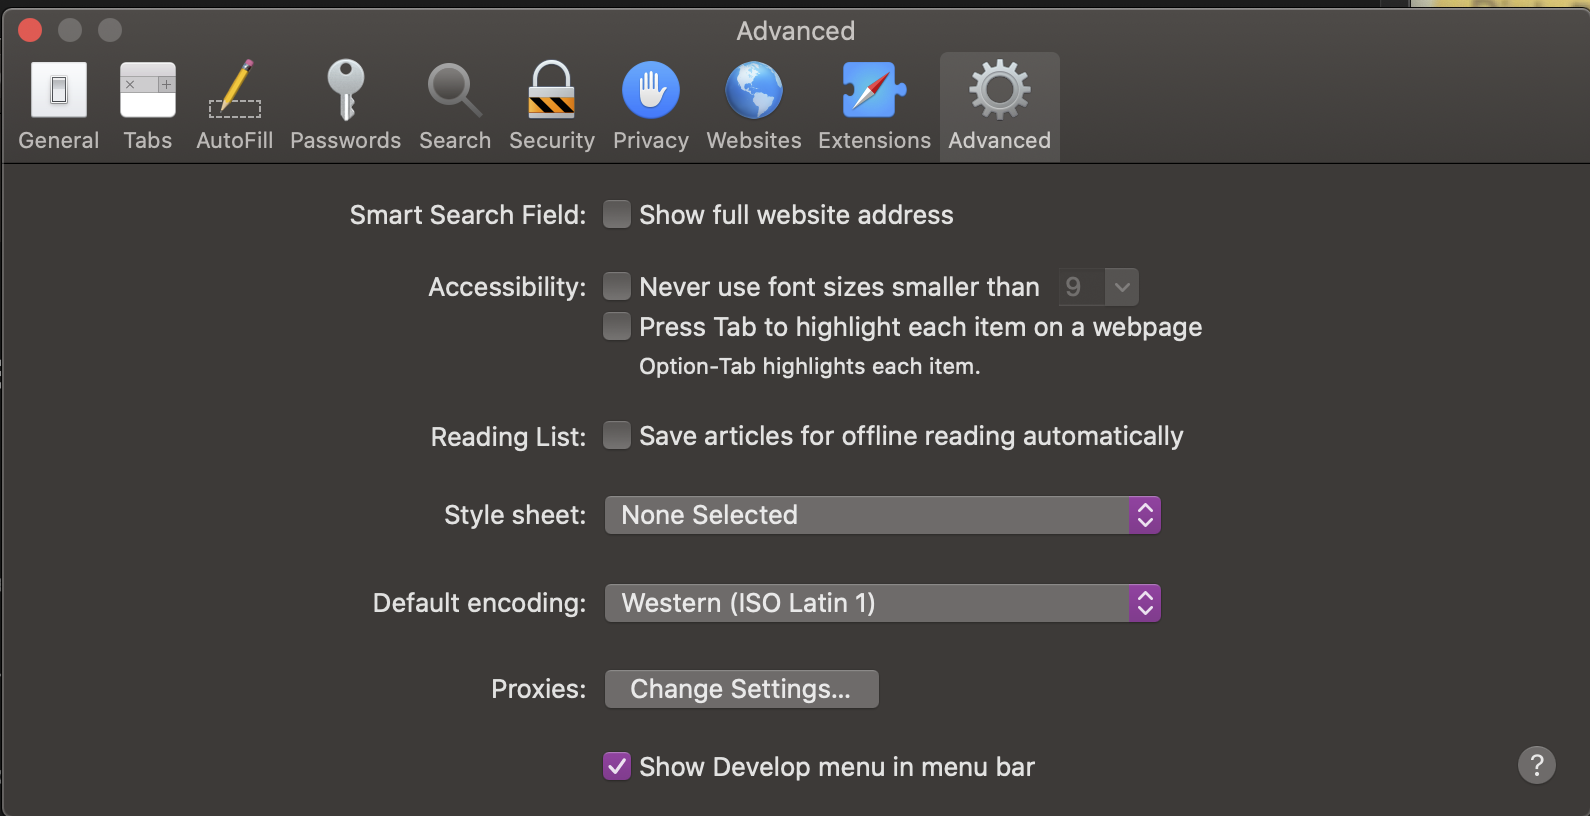
- Check “Allow Remote Automation”
- Dùng đoạn code dưới đây để chạy
public static void main(String[] args) {
        new SafariDriver();
    }
Chrome headless
Hiện nay với sự phát triển của các hệ thống đám mây giúp việc xây dựng cơ sở hạ tầng cho các sản phầm phần mềm nhanh chóng và tối ưu hơn. Việc thực thi các test tự động ở trên các nền tảng này cũng là một yêu cầu bức thiết.
Dưới đây là đoạn code có thể mở chrome dưới dạng headless mode. Headless mode là một chế độ mà trình duyệt được mở lên nhưng ko nhìn thấy được, giúp giảm tài nguyên của máy và vẫn đảm bảo là gần giống như một trình duyệt mà người dùng đang sử dụng.
   public static void main(String[] args) {
         ChromeOptions chromeOptions = new ChromeOptions();
         chromeOptions.setHeadless(true);
         new ChromeDriver(chromeOptions);
    }
Firefox headless
   public static void main(String[] args) {
        FirefoxBinary firefoxBinary = new FirefoxBinary();
        firefoxBinary.addCommandLineOptions("--headless");
        FirefoxOptions firefoxOptions = new FirefoxOptions();
        firefoxOptions.setBinary(firefoxBinary);
        new FirefoxDriver(firefoxOptions);
    }
Chrome mobile view
Trong rất nhiều trang web hiện nay đểu hỗ trợ nhiều view-port tức là nhiều kích thước màn hình từ điện thoại, máy tính bảng đên máy tính cá nhân. Do đó trong một số trường hợp thì chế độ này của Chrome cũng giúp các tester tiết kiêm được khá nhiều thời gian để kiểm tra.
   public static void main(String[] args) {
        Map<String, Object> mobileEmulation = new HashMap<>();
        mobileEmulation.put("deviceName", "iPad Pro");
        ChromeOptions opts = new ChromeOptions();
        opts.setExperimentalOption("mobileEmulation", mobileEmulation);
        new ChromeDriver(opts);
} Welcome to Testing Education center